
How to run Vagrant + VirtualBox on WSL 2 (2021)
HashiCorp Vagrant provides the same easy workflow regardless of your role as a developer, operator, or designer. It leverages a declarative configuration file that describes all your software requirements, packages, operating system configuration, users, and more.
This tutorial will guide you to install Vagrant on Windows using WSL 2 (Windows Subsystem for Linux) with VirtualBox provider.
🔴 This is an advanced topic. You should expect frequent changes. If you have encountered an issue, please leave a comment below to help me and the community resolve the issue.
The most important thing to mention:
- VirtualBox must be installed on Windows. Windows will handle the VirtualBox process which will create the VM through the Virtualization Type 2. Learn more about virtualization at https://www.ibm.com/cloud/learn/hypervisors.
- Vagrant must be installed on Linux (WSL 2). The Linux binary is required because the Windows version is not compatible with WSL 2.

Requirements
- Windows 10 - version +19042.928
- VirtualBox - version +6.1.22 (Windows version)
- WSL 2
- Vagrant +2.2.18 (Linux version)
- Vagrant plugin: virtualbox_WSL2
- (maybe) PowerShell Preview
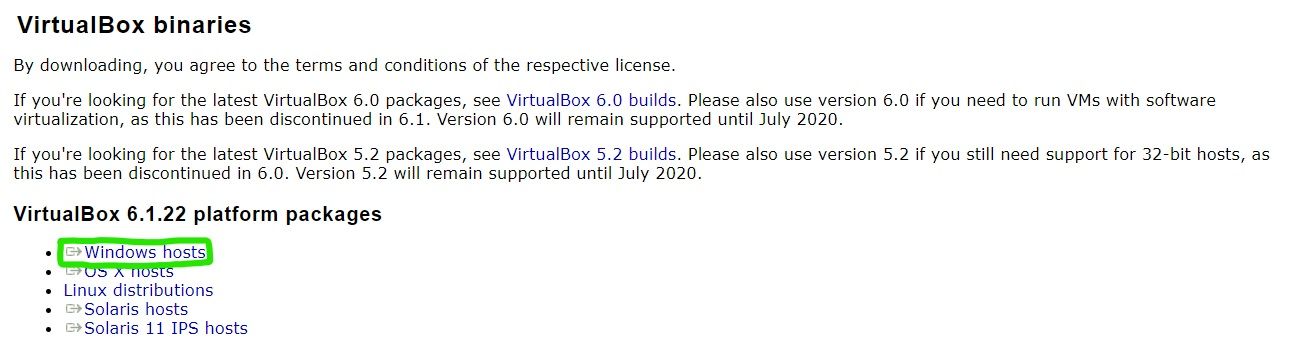
Install VirtualBox
Just go to the download page and download the VirtualBox executable for Windows, then run it:
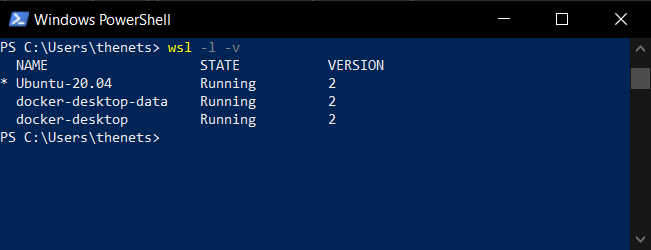
Install WSL 2
You must use WSL2. To install it, check the official documentation. I'll not set the guide here because it changes all the time:
Now open PowerShell and check if it's working properly and you are using version 2:
Install PowerShell Preview
Depending on your Windows version, you may need to install the PowerShell Preview version. If that's the case, go to your current PowerShell version and run the following command:
Invoke-Expression "& { $(Invoke-Restmethod https://aka.ms/install-powershell.ps1) } -UseMSI -Preview"This should open an installation wizard. Go through all the steps and finish the installation process. If it fails, you can try to install it from the Windows Store:


Install Vagrant
You must install Vagrant inside WSL. So you must download the Linux version.
Assuming you're using Ubuntu 20.04, run:
# run inside WSL 2
# check https://www.vagrantup.com/downloads for more info
curl -fsSL https://apt.releases.hashicorp.com/gpg | sudo apt-key add -
sudo apt-add-repository "deb [arch=amd64] https://apt.releases.hashicorp.com $(lsb_release -cs) main"
sudo apt-get update && sudo apt-get install vagrantThen, you must enable WSL 2 support. To do that, append two lines into the ~/.bashrc file:
# append those two lines into ~/.bashrc
echo 'export VAGRANT_WSL_ENABLE_WINDOWS_ACCESS="1"' >> ~/.bashrc
echo 'export PATH="$PATH:/mnt/c/Program Files/Oracle/VirtualBox"' >> ~/.bashrc

# now reload the ~/.bashrc file
source ~/.bashrcInstall virtualbox_WSL2 plugin
⚠ Since September 2021 vagrant starts to fail with an error like this one:
Bringing machine 'default' up with 'virtualbox' provider...
==> default: Checking if box 'hashicorp/bionic64' version '1.0.282' is up to date...
==> default: Clearing any previously set forwarded ports...
==> default: Clearing any previously set network interfaces...
==> default: Preparing network interfaces based on configuration...
    default: Adapter 1: nat
==> default: Forwarding ports...
    default: 22 (guest) => 2222 (host) (adapter 1)
==> default: Booting VM...
==> default: Waiting for machine to boot. This may take a few minutes...
    default: SSH address: 127.0.0.1:2222
    default: SSH username: vagrant
    default: SSH auth method: private key
    default: Warning: Connection refused. Retrying...
    default: Warning: Connection refused. Retrying...
    default: Warning: Connection refused. Retrying...
    default: Warning: Connection refused. Retrying...
    default: Warning: Connection refused. Retrying...
    default: Warning: Connection refused. Retrying...
==> default: Waiting for cleanup before exiting...
In order to fix it, an older solution from the community still solves the problem:
# Install virtualbox_WSL2 plugin
vagrant plugin install virtualbox_WSL2You can check the source code at:
- https://github.com/Karandash8/virtualbox_WSL2
Hello world with Vagrant for WSL2
Now that you have everything installed and configured, let's create a simple hello world project.
You'll need to go to Windows files using the WSL, then run every Vagrant command from there:
# Go to Windows user's dir from WSL
cd /mnt/c/Users/<my-user-name>/

# Create a project dir
mkdir -p projects/vagrant-demo
cd projects/vagrant-demo

# Create a Vagrantfile using Vagrant CLI
vagrant init hashicorp/bionic64
ls -l Vagrantfile

# Start a VM using Vagrantfile
vagrant up

# Login to the VM
# (password is 'vagrant')
vagrant ssh

# Done :)References
- VirtualBox download page
https://www.virtualbox.org/wiki/Downloads - Vagrant Quick Start tutorial
https://learn.hashicorp.com/tutorials/vagrant/getting-started-project-setup?in=vagrant/getting-started - Vagrant and Windows Subsystem for Linux
https://www.vagrantup.com/docs/other/wsl - Install WSL 2 on Windows 10
https://www.thomasmaurer.ch/2019/06/install-wsl-2-on-windows-10/ - Connection Refused in Vagrant using WSL 2
https://stackoverflow.com/questions/65001570/connection-refused-in-vagrant-using-wsl-2 - Karandash8/virtualbox_WSL2
https://github.com/Karandash8/virtualbox_WSL2